

Getting started with Bwat in Visual Studio Code
Getting Started with Bwat in VS Code
Bwat is an AI assistant that can write code, fix bugs, and build entire projects for you, right inside your code editor. This guide walks you through setting it up in VS Code from scratch. No coding experience needed. By the end, you will be chatting with Bwat and it will be writing real files on your computer.
Part 1 takes about ten minutes and gets you running. Parts 2 and 3 are for when you want better results out of it.
Part 1: Get set up
Step 1: Install VS Code
VS Code (short for Visual Studio Code) is a free code editor made by Microsoft. It is where Bwat lives, so you need it first.
- Go to https://code.visualstudio.com/ in your browser.
- Click the big Download button. The site automatically detects your operating system:
- Windows: you will get an installer file (ends in
.exe). - Mac: you will get a
.dmgfile. - Linux: you will get a
.debor.rpmpackage depending on your distribution.
- Windows: you will get an installer file (ends in
- Once downloaded, open the file and follow the installer prompts. On Windows, you can just keep clicking Next and then Install. The default options are fine for everyone.
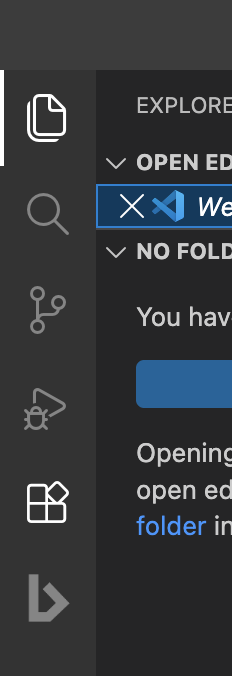
- When it finishes, open VS Code. You will see a welcome screen with a colorful sidebar icon on the far left.
That sidebar on the far left is called the Activity Bar. You will use it in the next step.
Step 2: Find the Bwat extension
Extensions are small add-ons that give VS Code new abilities. Bwat is one of them.
You have two ways to find it:
Option A: The direct link (fastest)
Open this link in your browser and click Install:
https://marketplace.visualstudio.com/items?itemName=CasaManagementSolutions.bwat-dev
Your browser will ask permission to open VS Code. Click Open and VS Code takes it from there. Skip to Step 3.
Option B: Search inside VS Code
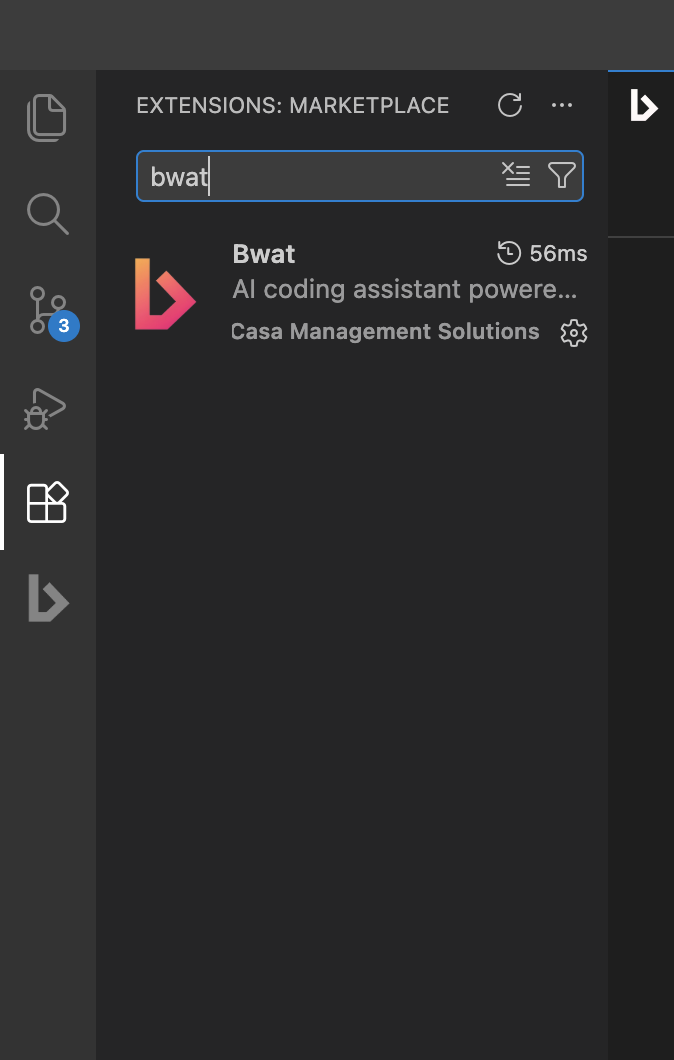
- Look at the Activity Bar on the far left of VS Code. Click the icon that looks like four small squares with one slightly tilted away. Hovering over it shows a tooltip that says Extensions. (Keyboard shortcut:
Ctrl+Shift+Xon Windows and Linux,Cmd+Shift+Xon Mac.) - A search box appears at the top. Type Bwat.
- You will see Bwat in the results list.
Step 3: Install Bwat
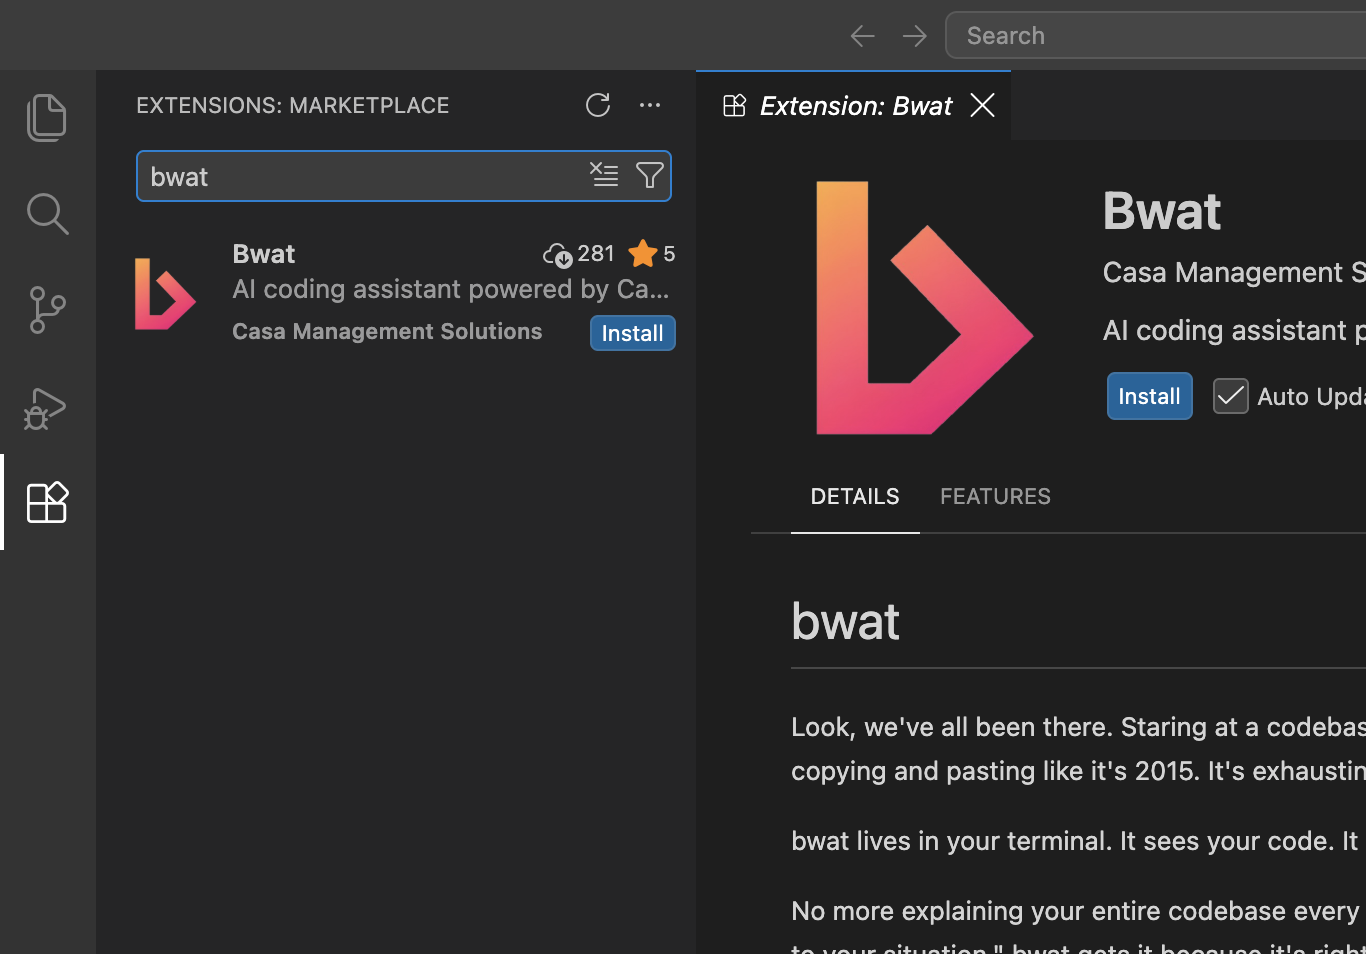
- Click on Bwat in the list to open its page.
- Click the blue Install button.
- Wait a few seconds. When the button changes to a gear icon or says Installed, you are done.
Step 4: Open the Bwat panel
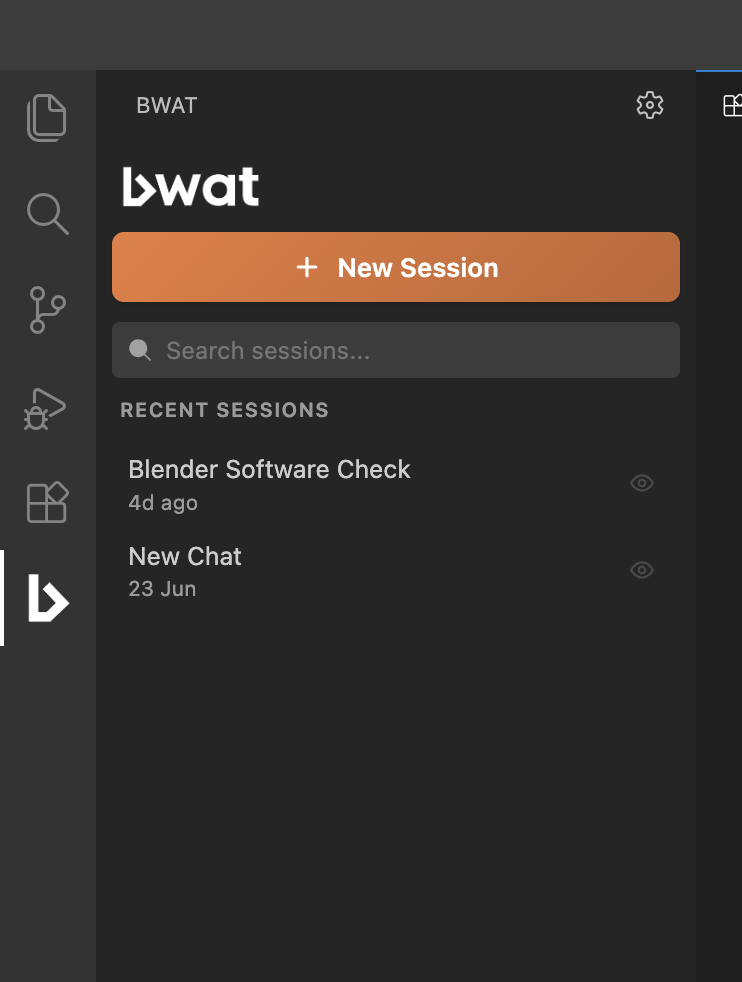
Look at the Activity Bar on the far left again. There is now a new Bwat icon there. Click it and the Bwat panel slides open, ready for you to chat.
Step 5: Sign in with Google
Bwat needs you to sign in so your chats and projects are saved to your account.
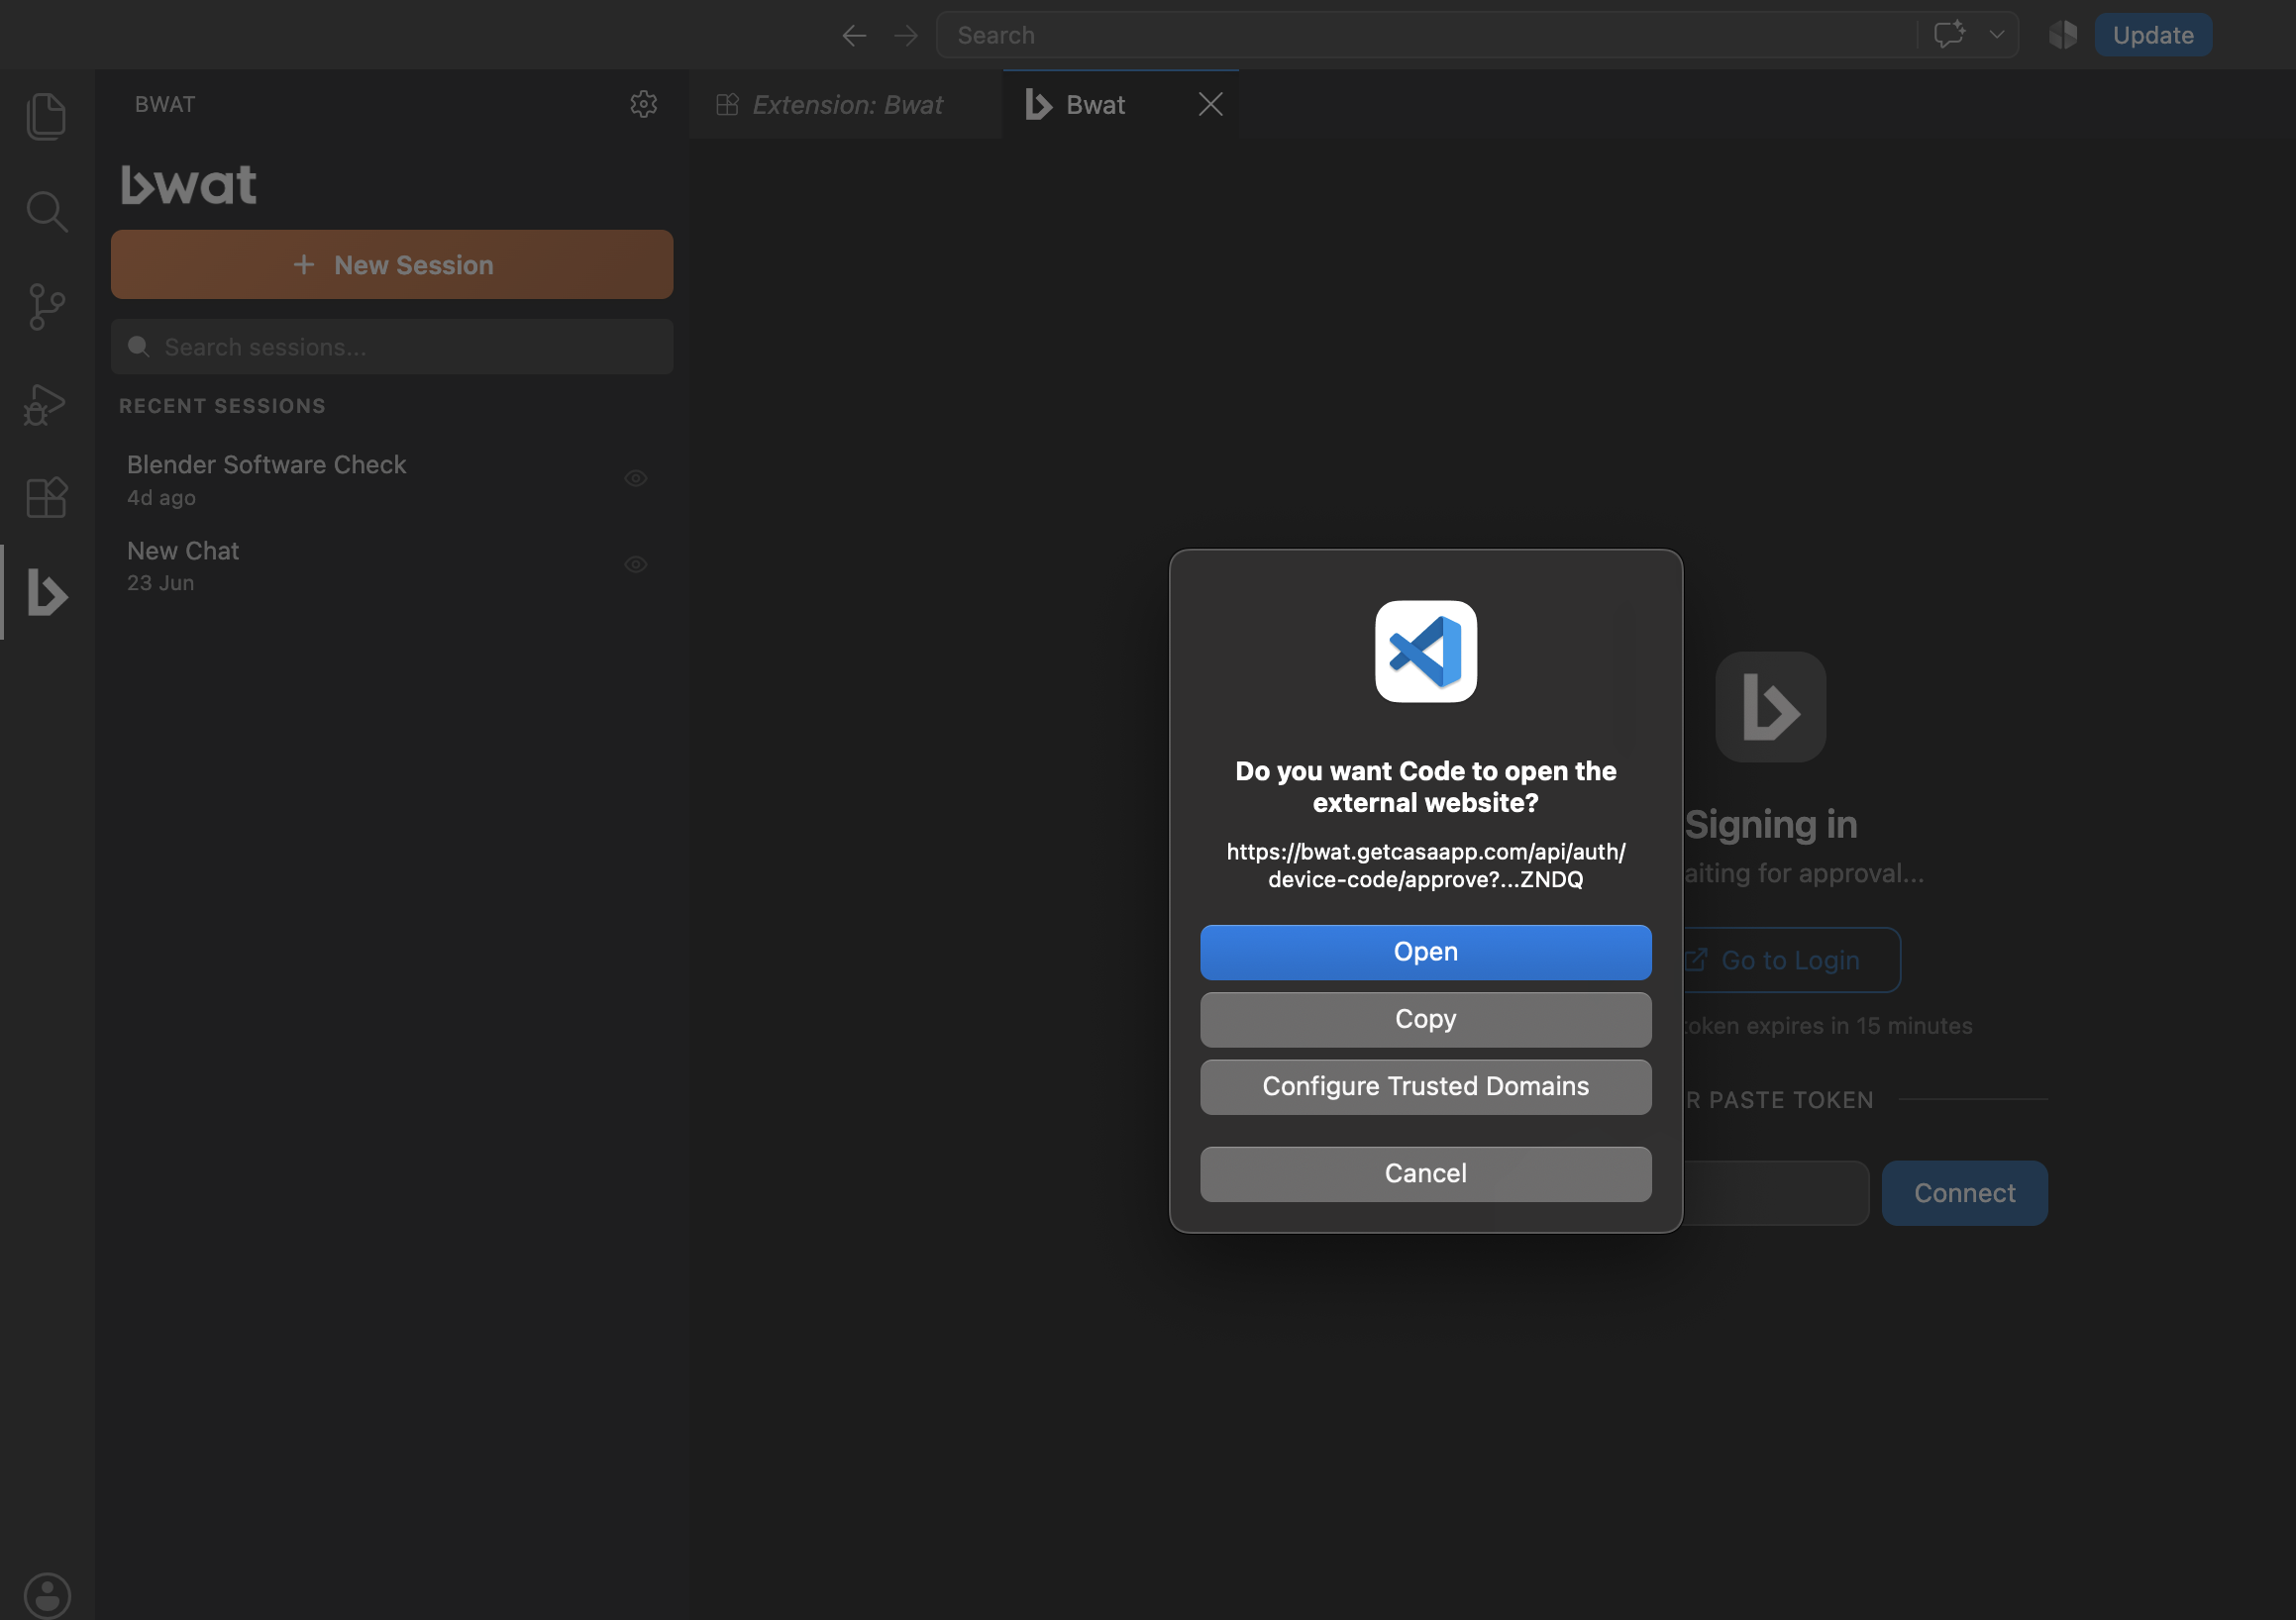
- In the Bwat panel, click the Sign in button.
- A browser window opens with sign in options.
- Choose Continue with Google. It is the easiest option since it skips creating a new password. Pick the Google account you want to use and confirm.
- The browser will tell you to return to VS Code. Click Open if it asks.
Back in VS Code, the Bwat panel now shows you are signed in and ready to go.
Step 6: Start chatting with Bwat
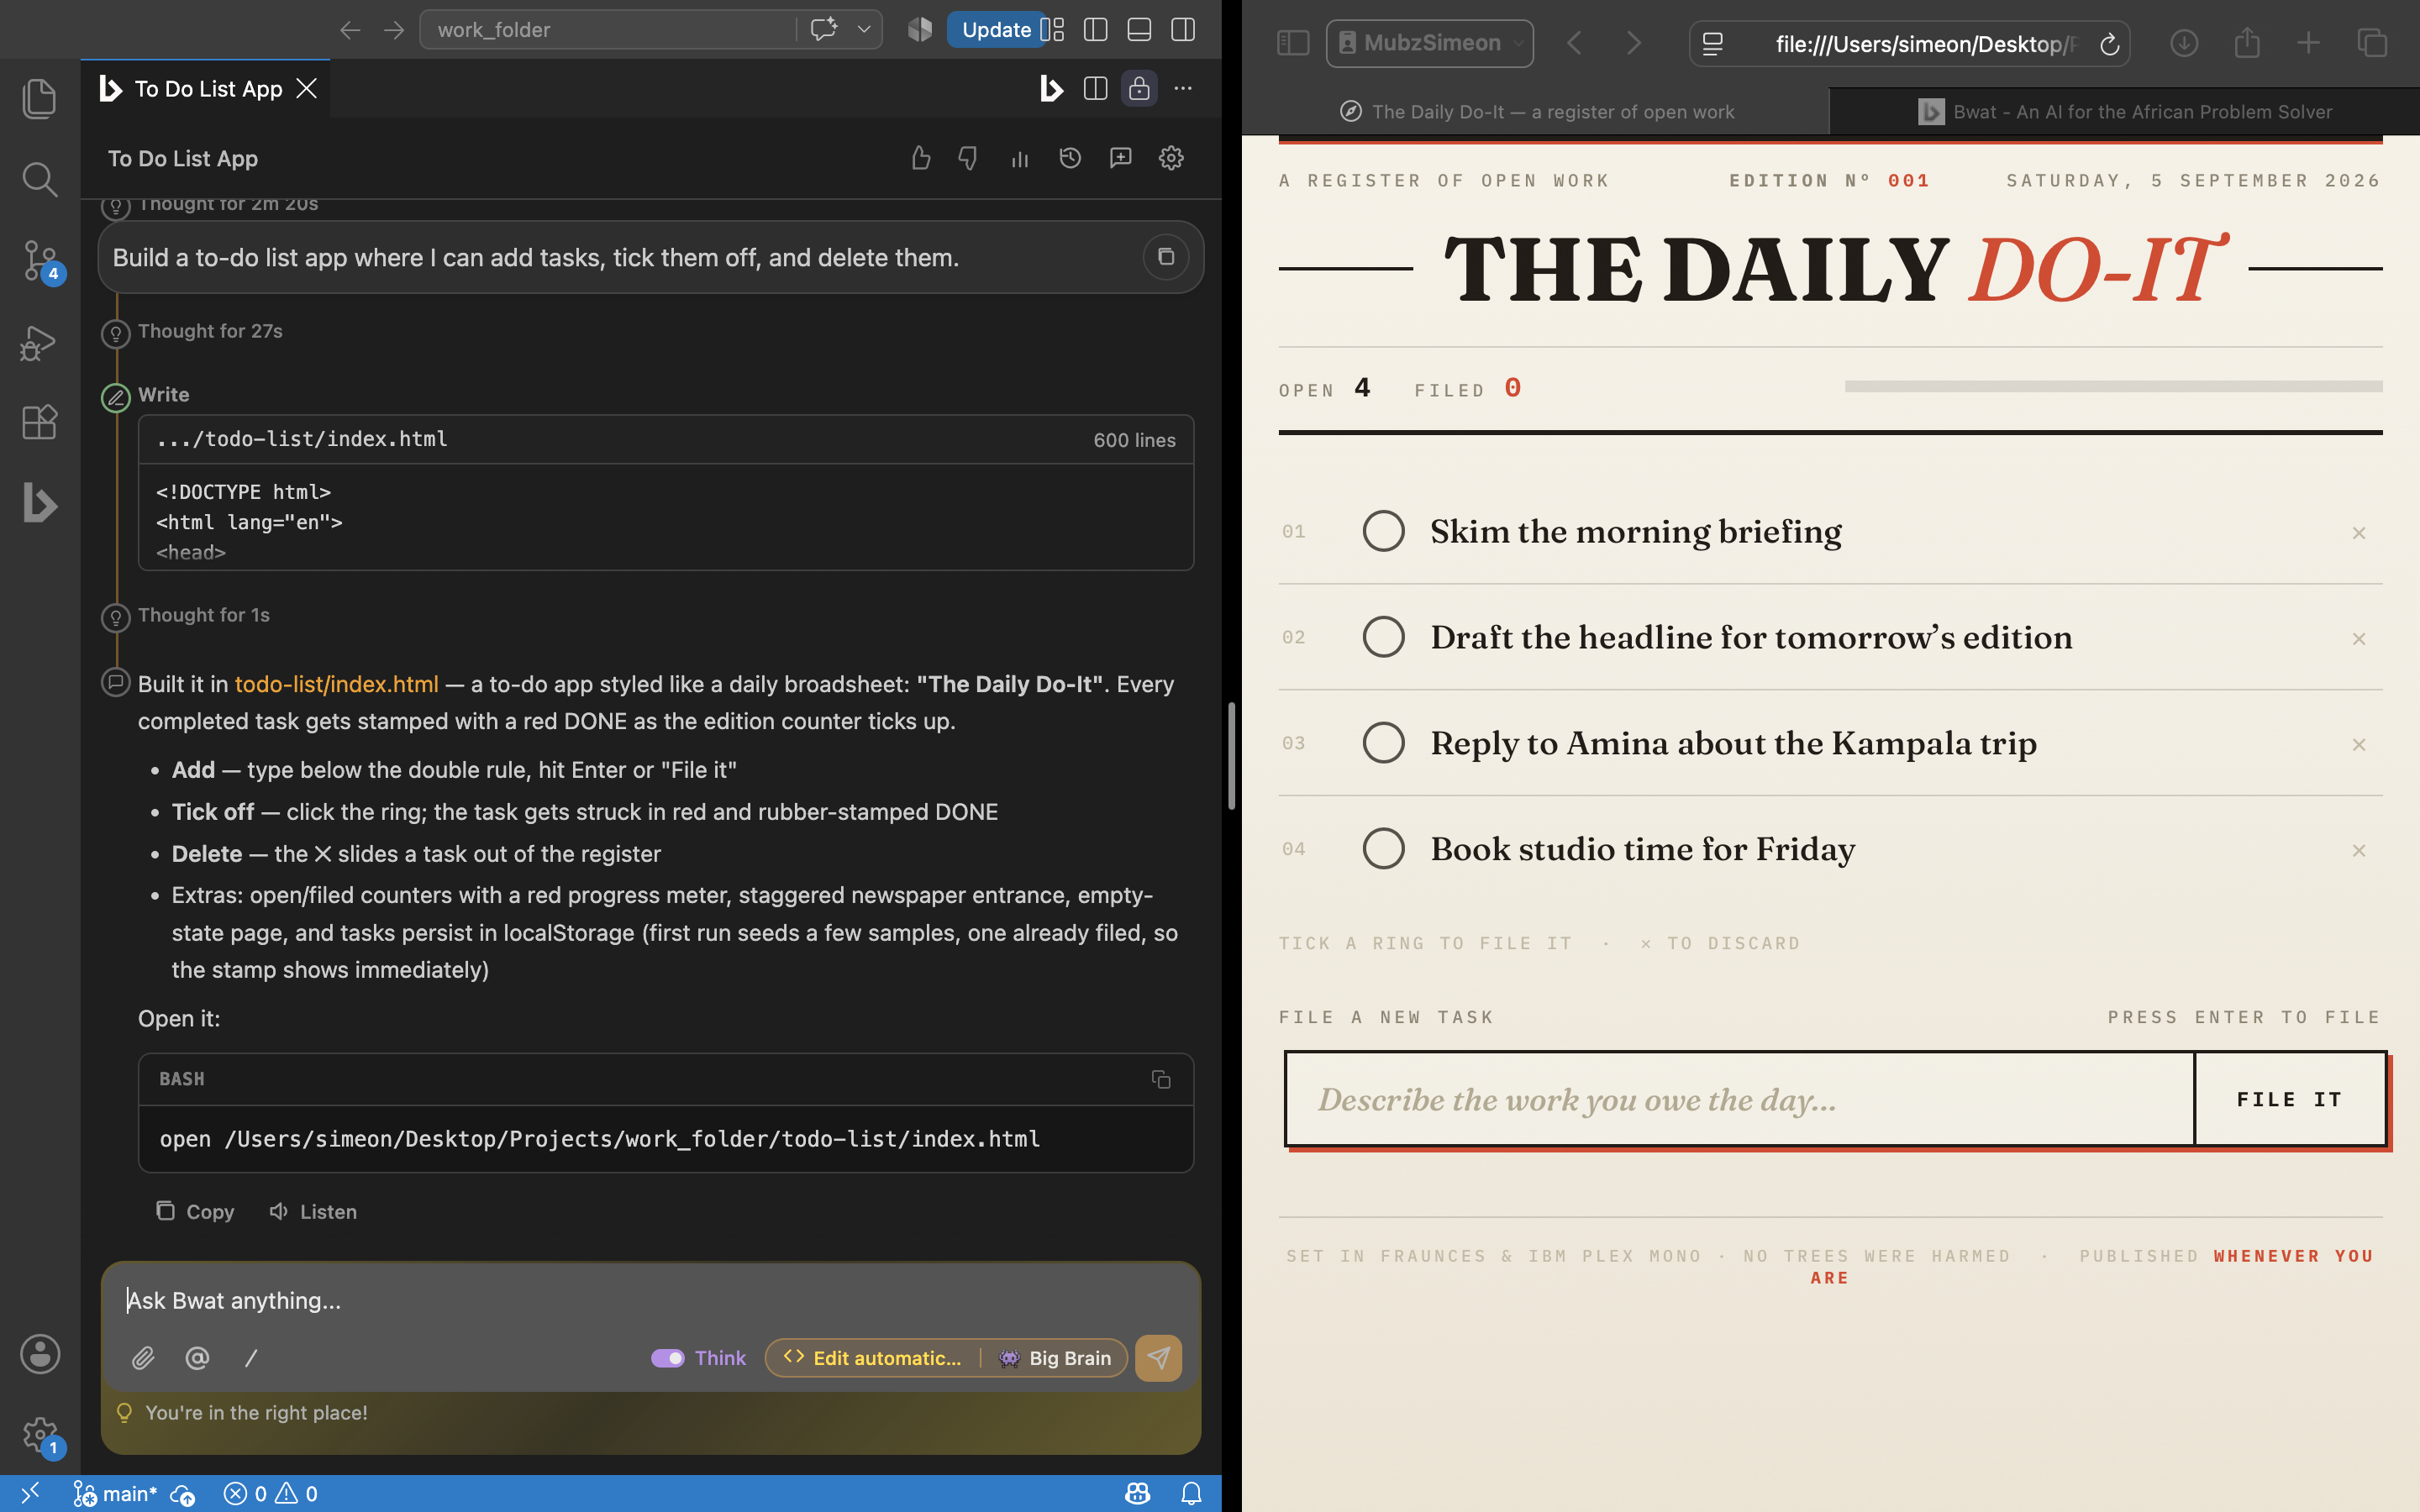
This is the fun part. Type what you want in the Bwat chat box, just like texting a friend, and Bwat will create files, write code, and explain what it is doing as it goes.
A few tips for good results:
- Say what you want, not how to do it. You do not need technical words. "Make me a website for my salon with a price list and a contact form" works perfectly.
- Start small. Give Bwat one clear thing to do first. Once that works, ask for the next thing.
- You are in control. Bwat shows you every file it creates and every command it wants to run before it does anything. You approve each step.
Sample prompts to try right now
Copy any of these straight into the chat:
Make me a simple personal website with my name, a photo placeholder, and a short bio. Use purple as the main color.
Build a to-do list app where I can add tasks, tick them off, and delete them.
Create a calculator that works in the browser and looks modern.
Explain what the files in this folder do, in simple English.
Make a birthday invitation card I can print, for my sister Nalubega, with balloons on it.
The first prompt you send might take a minute while Bwat sets up your project. After that it gets faster.
Part 2: Choosing how Bwat thinks
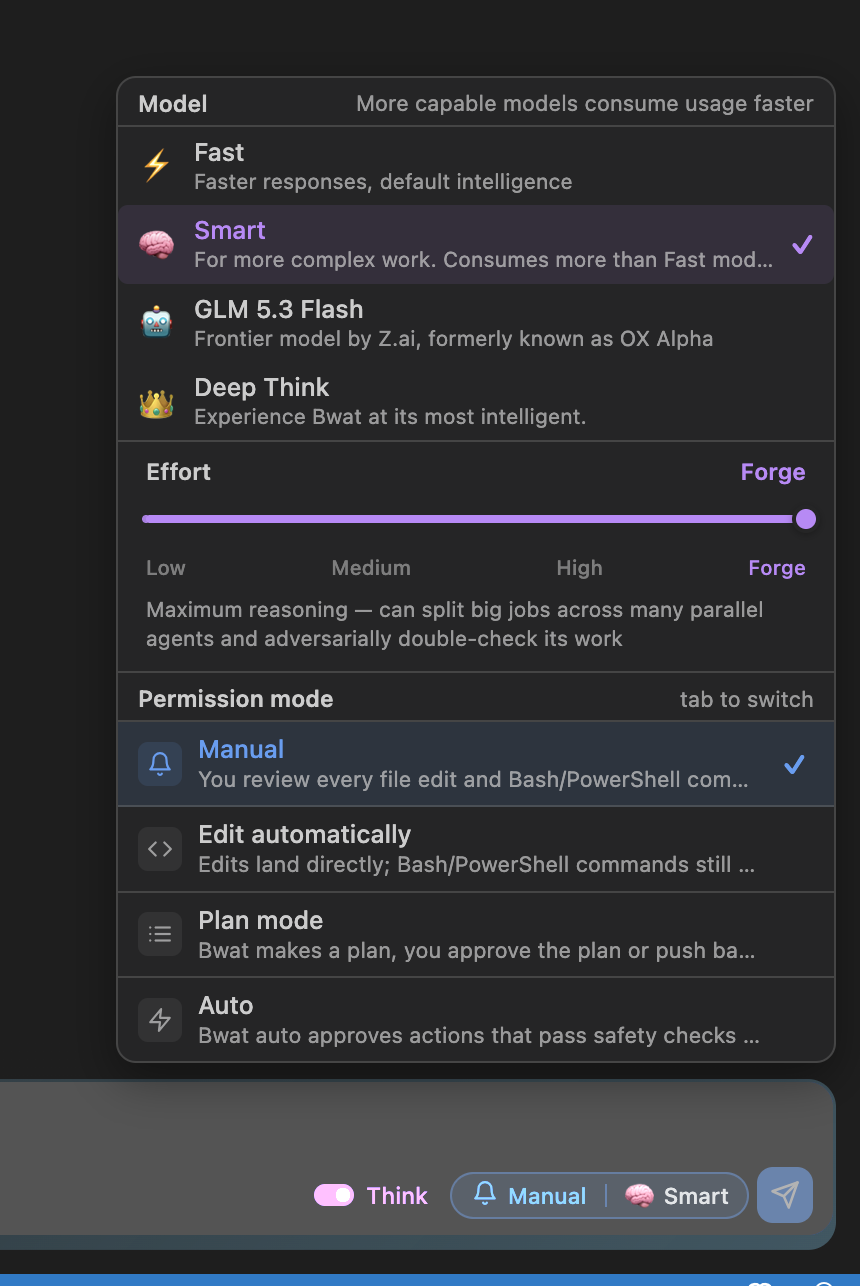
Once you are comfortable, you get two dials. One picks how clever Bwat is. The other picks how long it thinks before answering. Both live in the row of controls under the chat box.
Dial one: the brain mode
| Mode | Best for | What it costs you |
|---|---|---|
| Fast | Everyday work. Small edits, questions about your code, quick pages. This is the default and it is genuinely good. | The least |
| Smart | Real features, tricky bugs, anything with several moving parts. | Noticeably more than Fast |
| Deep Think | The hard problem you are stuck on. Bwat at its most capable. | The most by a wide margin |
Deep Think runs on a Fable class model, which is the most powerful thing Bwat can reach for and the most expensive to run. Treat it as something you reach for on purpose, not something you leave switched on. Try Fast first. Move up only when Fast gets it wrong.
A good habit: stay on Fast, and when an answer disappoints you, switch to Smart and ask again rather than rewording the same prompt five times.
Dial two: the effort level
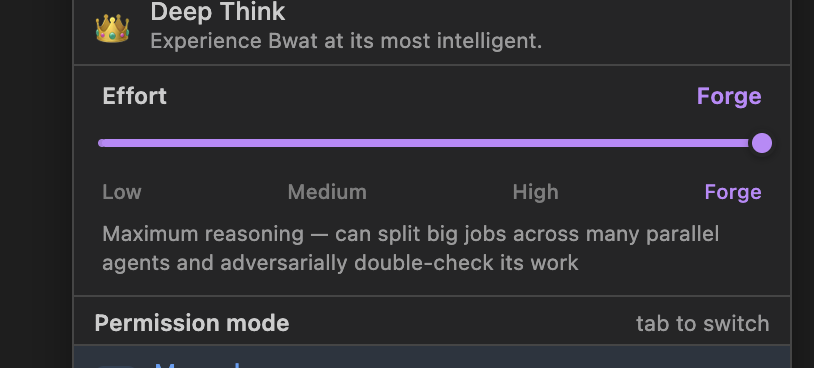
Effort controls how long Bwat thinks before it starts answering. There are four settings: Low, Medium, High and Forge. High is the default and suits almost everything.
Forge is the interesting one. It does two things at once:
- It puts Bwat at its highest thinking effort.
- It lets Bwat make a copy of itself whose only job is to argue with the first copy. That second Bwat goes back over the work looking for what is wrong with it, and the first one fixes what it finds.
That adversarial double check catches real mistakes, and it is the closest thing to having Bwat review its own homework properly. It also means the job runs twice, so it uses much more of your plan than a normal reply. Save it for work that genuinely matters: something you are about to ship, or a bug that has already survived two attempts.
Fast mode has no Forge setting. Forge asks a model to reason hard and then critique itself, which is not what Fast is built for, so the Forge stop disappears from the slider when you are on Fast. Switch to Smart or Deep Think and it comes back.
The short version
All of this consumes your plan. A bigger brain mode costs more than a smaller one, and higher effort costs more than lower effort, and Forge costs the most of all because the work happens twice. Nothing here is metered per keystroke, so do not be nervous about it, but do not leave Deep Think and Forge running all day either.
Type /usage in the chat at any time to see how much of your plan you have used.
Part 3: Habits that make Bwat much better
These are the things that separate people who love Bwat from people who find it frustrating.
Break a long job into bits
This is the single biggest one. Bwat stays sharp and focused on a job the size of one clear task, and gets vague on a job the size of ten.
Instead of one giant prompt:
Build me a full shop with products, a cart, checkout, payments, an admin dashboard, user accounts and email receipts.
Do it as a conversation:
Build the product listing page with six sample products.
Then, once that works:
Now add a cart I can add products to.
Then:
Now add a checkout page that shows the cart total.
You get better code, you can see each piece working before you build on it, and when something goes wrong you know exactly which step broke it. It also uses less of your plan than one enormous request that has to be redone.
If a conversation has been running a long time and Bwat starts feeling forgetful, type /compact. It summarises what has happened so far and frees up room, so Bwat keeps its focus without you losing the thread.
Point at exact files with @
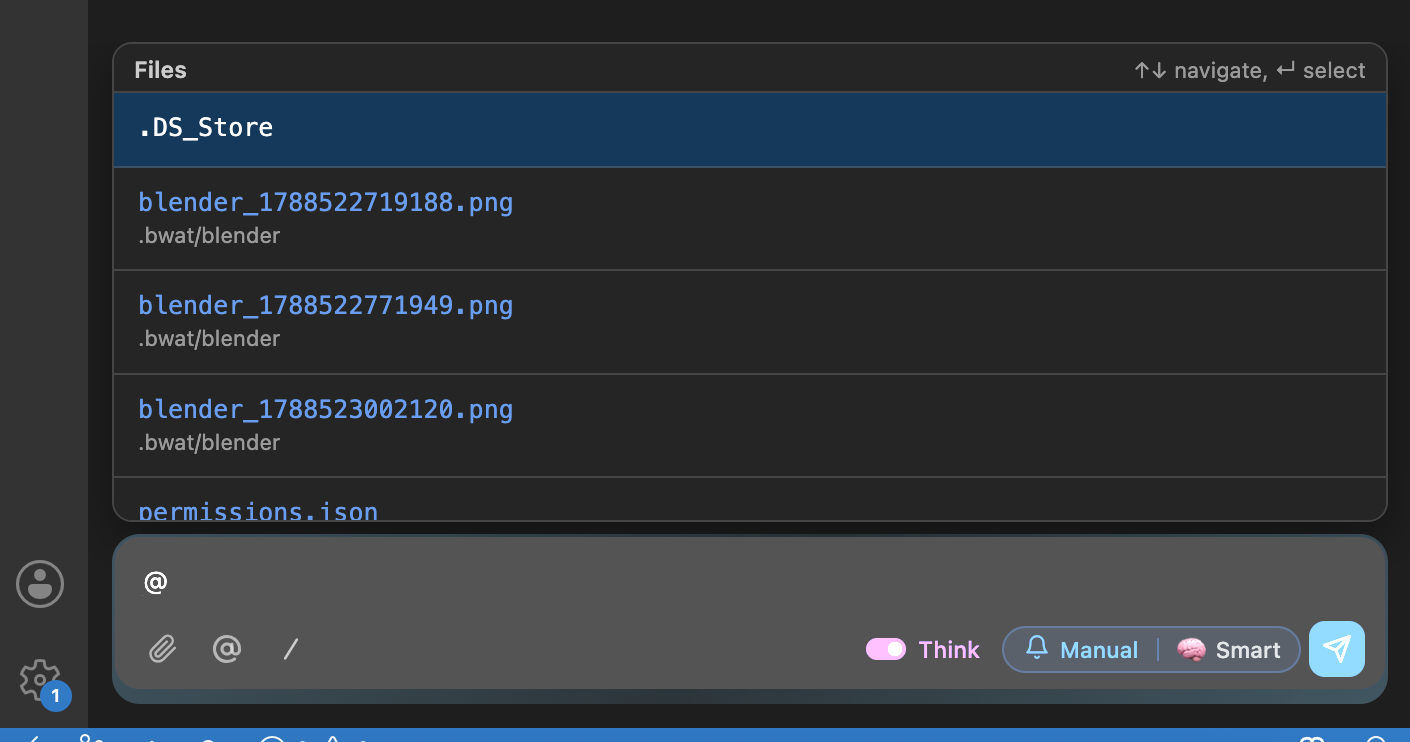
Type @ in the chat box and a list of your files appears. Pick one and Bwat reads that exact file.
This beats describing a file in words. "Fix the bug in @checkout.js" gets you a much better answer than "fix the bug in my checkout page", because Bwat is looking at the real thing instead of guessing which file you meant. You can attach several files to one message.
Slash commands
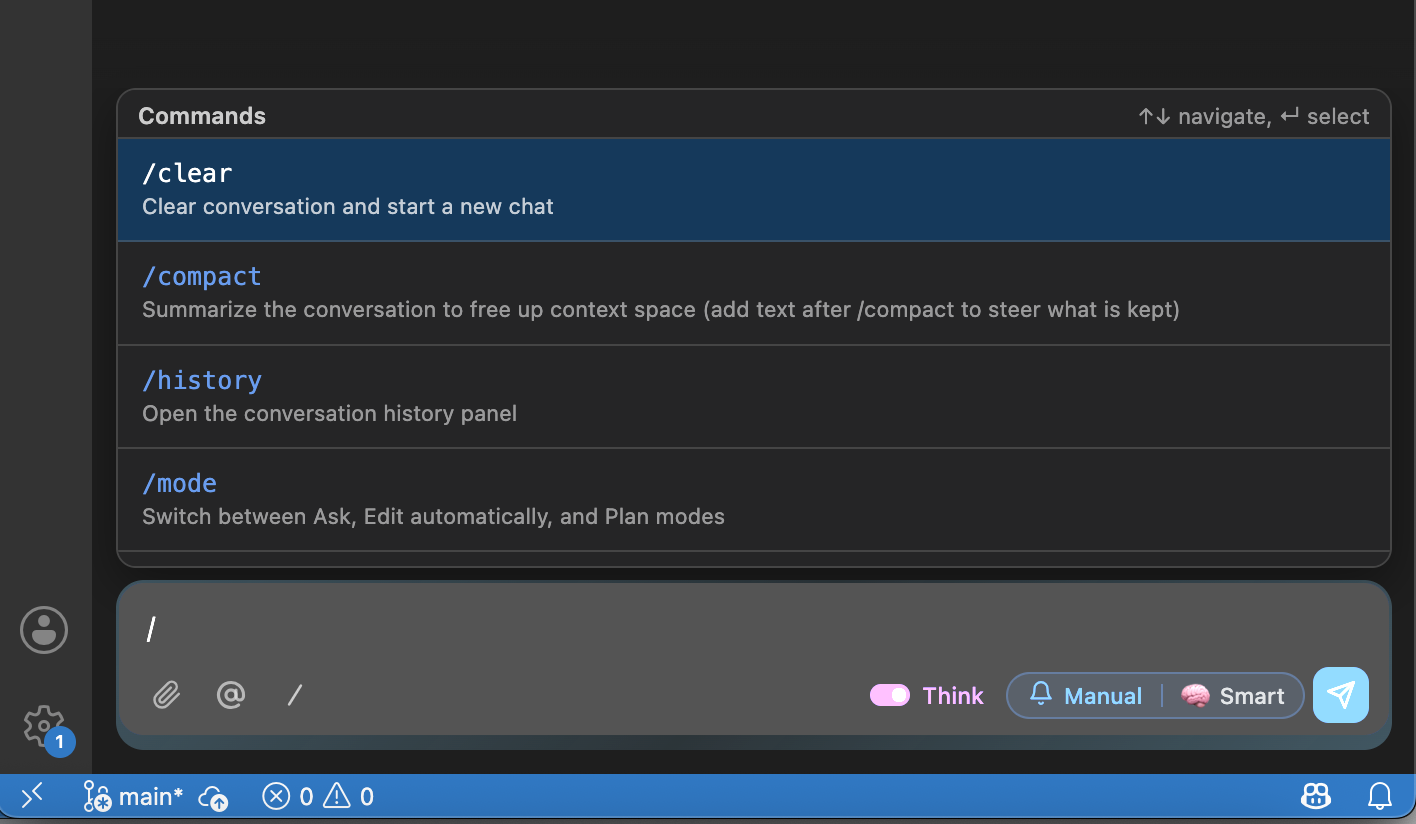
Type / in the chat box to see the full list. The ones worth knowing:
| Command | What it does |
|---|---|
/clear | Start a fresh chat |
/compact | Summarise a long conversation to free up room |
/usage | See how much of your plan you have used |
/mode | Switch between Ask, Edit automatically, and Plan |
/effort | Open the thinking effort slider |
/explain | Explain the file you have open, or the code you have selected |
/init | Have Bwat read your whole project and write itself notes about it |
/history | Reopen an older conversation |
/skills | See the extra abilities available to Bwat right now |
/init is worth running once on any project you will be working in for a while. Bwat reads the codebase and writes down what it learned, then uses those notes in every later chat so you stop having to explain your project each time.
Have your changes explained like you are five
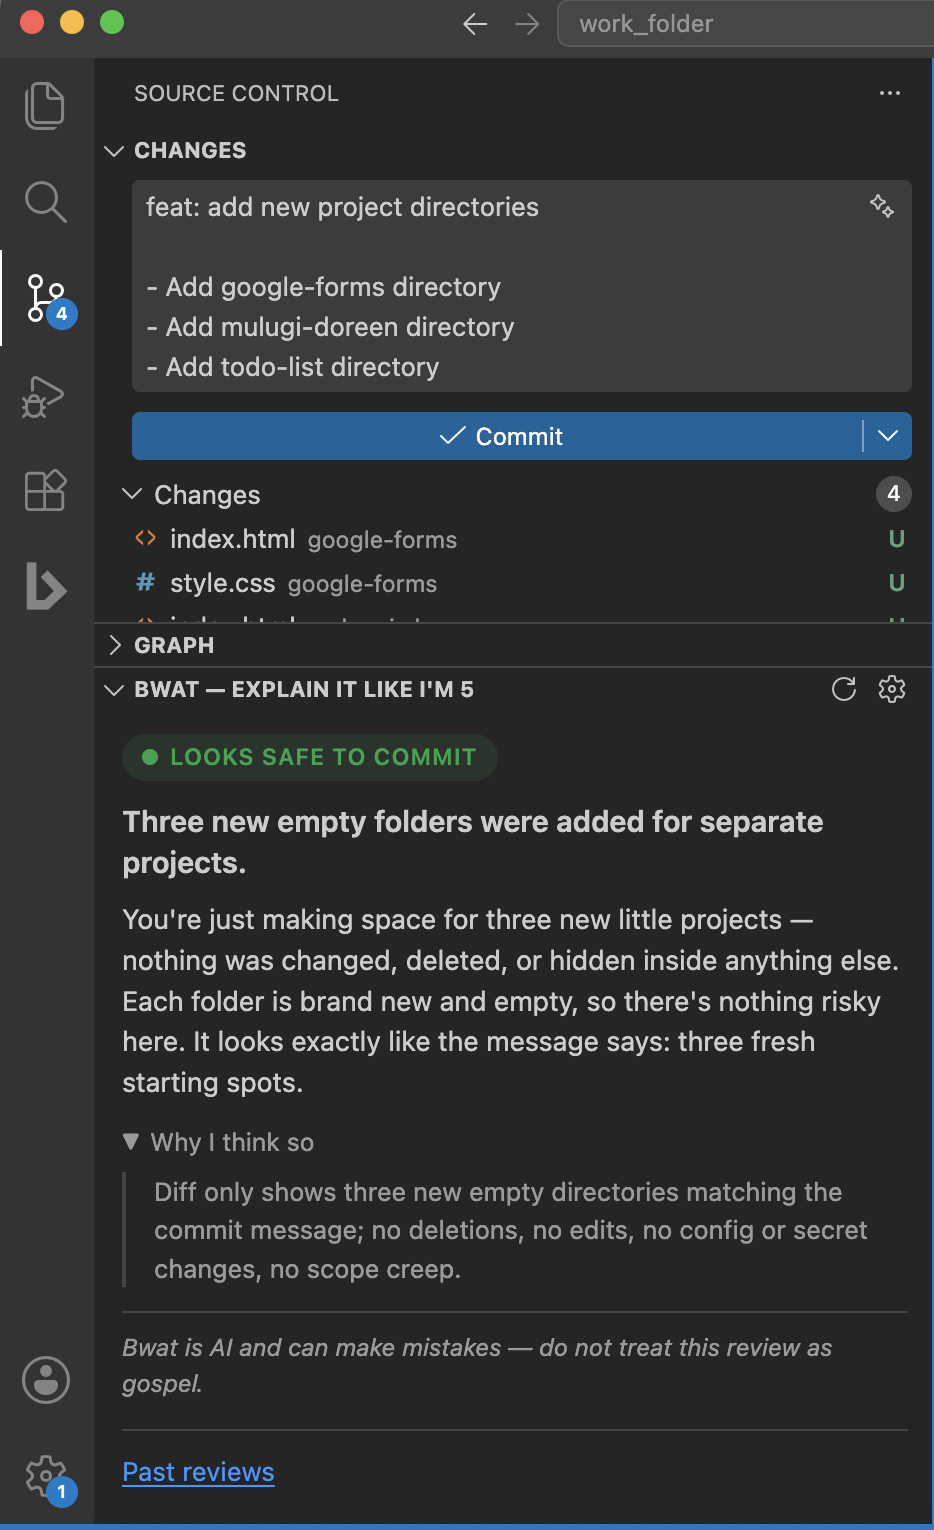
Open the Source Control panel in VS Code (the icon that looks like a branching line) and you will find a Bwat panel there too.
Every time you are about to save your work, Bwat reads what actually changed and gives you a plain English verdict on it: green if it looks fine, orange if something is worth a second look, red if something looks wrong. Underneath, it explains what changed in the simplest possible terms, with no jargon.
This is genuinely useful even if you cannot read code. It is the difference between saving changes you do not understand and saving changes someone just explained to you.
You are all set
That is the whole thing. Install VS Code, add the Bwat extension, sign in, and start talking to it. Stay on Fast for everyday work, reach for Smart when it matters, and save Deep Think and Forge for the hard problems. Break big jobs into small ones, point at files with @, and let the Source Control panel explain your changes back to you.
From here, just keep the conversation going. Ask Bwat to change things, add features, or fix anything that looks off. It learns what you want as you chat.
If you get stuck at any step, ask Bwat itself, or reach us at https://getcasaapp.com/contact
More from the newsroom
We were interviewed and featured in a blog by AfriqIQ
BWAT was built specifically for the gap between the frontier models that exist and the African users who cannot reach them
A beginner's guide to maximizing session usage on Bwat
Learn how to get the most out of your free Bwat plan by sticking with Fast mode. It uses less of your usage budget, so you can solve more coding problems without upgrading.
Get Started with bwat in 6 Easy Steps
Follow these six simple steps to start using bwat, your AI coding agent, inside VS Code and on your phone. From sign-up to full automation, you'll be productive in minutes.